How to Cook Tri-Tip in the Oven for Tender, Juicy Results
Tri-tip, often celebrated as a culinary gem, offers a delightful combination of robust beefy flavor and surprising tenderness when prepared correctly. Once primarily a West Coast secret, this triangular cut from the bottom sirloin is rapidly gaining national acclaim for its affordability, versatility, and sheer deliciousness. While grilling is a popular method, the beauty of learning how to cook
tri tip in the oven means you can enjoy this succulent roast year-round, regardless of the weather outside. Forget the notion that tender, juicy beef is only for special occasions or complicated recipes; with a few simple techniques, you can achieve restaurant-quality results right in your comfort of your kitchen. This comprehensive guide will walk you through the sear-and-roast method, ensuring your oven-cooked tri-tip is a masterpiece every single time.
What Makes Tri-Tip So Special?
Before we dive into the cooking process, let's appreciate what makes tri-tip such a standout cut. Known sometimes by other names like "California cut" or "Santa Maria steak," tri-tip is distinctively triangular in shape and boasts a good amount of marbling and a rich beef flavor. It’s essentially a very lean and flavorful roast, perfectly sized for a family dinner without being overwhelming. Many cuts can be bought as whole roasts or pre-sliced into steaks – which are simply smaller portions of the same excellent meat.
What sets tri-tip apart, beyond its flavor, is its ability to transform into an incredibly tender dish when cooked to the right internal temperature, particularly medium-rare. Its manageable size and quick cooking time make it an ideal candidate for both a casual weeknight meal and an impressive centerpiece for a holiday gathering. And the best part? Leftovers are phenomenal, lending themselves perfectly to sandwiches, tacos, or salads the next day.
Mastering Tri-Tip in the Oven: The Sear-Roast Method
The secret to truly tender and juicy
tri tip in the oven lies in a simple yet incredibly effective technique: the sear-and-roast method. This dual approach leverages the best of both stovetop and oven cooking. First, you create a beautiful, flavorful crust on the meat by searing it in a hot pan. Then, you transfer it to the oven to finish cooking gently and evenly to your desired doneness. This ensures maximum flavor, superior texture, and prevents the meat from drying out. This method is quick, efficient, and yields results worthy of any culinary enthusiast.
Step-by-Step Guide to Perfection
Follow these detailed steps to achieve a perfectly cooked tri-tip that's tender on the inside and deliciously crusted on the outside.
1. Preparation is Key
*
Unpack and Pat Dry: Remove your tri-tip roast from its packaging. It’s crucial to pat the entire surface thoroughly dry with paper towels. This step is vital for achieving a proper sear and a beautiful crust. Moisture on the surface will steam the meat instead of browning it.
*
Season Liberally: Place the roast on a clean cutting board or a work surface (a piece of heavy-duty aluminum foil makes for easy cleanup). Generously sprinkle both sides with coarse kosher salt and freshly cracked black pepper. Don't be shy with the seasoning; it forms the foundation of your flavor. Use clean hands to pat the seasonings firmly onto all surfaces of the meat. If you prefer, you can use your favorite steak rub or add a touch of garlic powder and onion powder for extra depth.
2. The Searing Stage
*
Heat the Pan: Place a heavy-bottomed, oven-safe skillet (cast iron works exceptionally well here) on your stovetop over medium-high heat. Allow the pan to get *smoking hot* – this is key for a good sear.
*
Add Oil: Once the pan is hot, add a tablespoon or two of olive oil (or another high smoke point oil like avocado or grapeseed oil) and tilt the pan to coat the entire bottom surface.
*
Sear the Roast: Carefully place the seasoned tri-tip into the hot pan. Sear for 3-4 minutes on one side until a deep, golden-brown crust forms. Resist the urge to move or turn the meat before this time; patience here pays off in flavor. Flip the roast and sear for another 3-4 minutes on the second side. You’re aiming for a rich, browned exterior, not to cook it through.
3. Oven Roasting for Tenderness
*
Transfer to Oven: Immediately after searing both sides, carefully transfer the hot skillet (with the tri-tip still in it) directly into a preheated oven set to 400°F (200°C).
*
Roast to Temperature: Continue to cook the tri-tip in the oven for approximately 10 minutes per pound, or until it reaches your desired internal temperature. Tri-tip is most tender and juicy when cooked to medium-rare. We recommend pulling it out when it reaches about 130-135°F (54-57°C) for medium-rare, keeping in mind it will continue to cook a few degrees as it rests. A reliable meat thermometer is your best friend here! For a quick and easy oven tri-tip that's perfect any time of year, mastering this temperature control is essential. For more on achieving that perfect doneness, check out our guide on
Ultimate Oven-Roasted Tri-Tip: From Sear to Perfect Medium-Rare.
4. The Flavor Boost & Resting Period
*
Infuse with Flavor: Once the tri-tip reaches your target temperature, carefully remove the screaming hot pan from the oven and place it back on the stovetop. Immediately add several pats of butter (2-3 tablespoons) and a few smashed cloves of garlic to the pan. The residual heat will melt the butter, gently cook the garlic, and combine with the delicious pan drippings, creating an aromatic, savory sauce.
*
Baste with Goodness: Using a pot holder, carefully tilt the pan and spoon these buttery, garlicky juices over the finished roast. If desired, this is also the perfect time to add a few sprigs of fresh rosemary or thyme to the pan for an extra layer of herbal notes.
*
Rest, Rest, Rest: This step is non-negotiable for tender, juicy results. Tent the roast loosely with aluminum foil and let it rest undisturbed for 10-15 minutes. This allows the carryover cooking to complete and, more importantly, gives the juices inside the meat time to redistribute evenly throughout the roast. Skipping this step means all those wonderful juices will escape onto your cutting board, leaving you with a drier, less flavorful cut.
Slicing and Serving Your Masterpiece
After the crucial resting period, it’s time to slice and savor your perfectly cooked
tri tip in the oven.
*
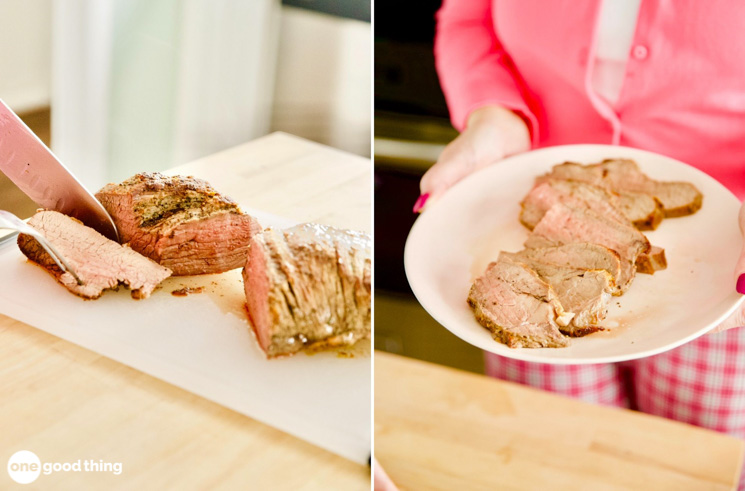
Slice Against the Grain: Transfer the rested tri-tip to a clean cutting board. To maximize tenderness, it is absolutely essential to slice the meat *against the grain*. Look closely at the meat fibers; they run in a particular direction. Orient your knife perpendicular to these fibers and slice into thin pieces. This shortens the muscle fibers, making each bite incredibly tender. Tri-tip often has two different grain patterns that meet in the middle, so you might need to cut the roast in half first and then slice each piece against its respective grain.
*
Serve with Pan Juices: For an extra layer of flavor and moisture, you can return the sliced meat to the pan and spoon the buttery, garlicky pan mixture over the individual slices before serving. This is a fantastic way to ensure every bite is bursting with taste.
*
Delicious Leftovers: Any leftover tri-tip is a treat! It makes incredible sandwiches, adds robust flavor to salads, or can be repurposed into wraps or tacos.
Pro Tips for the Perfect Tri-Tip in the Oven Every Time
Elevate your tri-tip cooking game with these expert recommendations:
*
Bring to Room Temperature: For more even cooking, remove your tri-tip from the refrigerator about 30-60 minutes before you plan to sear it. This allows the meat to relax and cook more uniformly from edge to center.
*
Don't Overcook: As reiterated, tri-tip truly shines at medium-rare. Overcooking will result in a dry, tough piece of meat. Invest in a good meat thermometer and pull the roast off the heat when it's a few degrees below your target temperature, accounting for carryover cooking.
*
Embrace the Rest: We cannot stress this enough. The resting period is paramount to juicy results. Be patient!
*
Experiment with Seasoning: While salt and pepper are classic for a reason, don't hesitate to experiment with different rubs and spices. Paprika, cayenne, cumin, or a touch of brown sugar can all add exciting dimensions to your tri-tip.
*
Use the Right Tools: A heavy-bottomed, oven-safe skillet (like cast iron) is key for a consistent sear. A reliable instant-read meat thermometer is your absolute best friend for nailing doneness. If you're looking for a fuss-free method to get that tender, juicy tri-tip on the table, remember the importance of these tools. For more helpful tips on making
Quick & Easy Oven Tri-Tip: Perfect Any Time of Year, ensure your kitchen is equipped.
Conclusion
Cooking
tri tip in the oven is an incredibly rewarding experience that yields a tender, flavorful, and juicy roast perfect for any occasion. By following the simple sear-and-roast method, paying attention to internal temperatures, and understanding the vital role of resting, you can consistently achieve outstanding results. This versatile cut is not only delicious but also surprisingly easy to master, proving that gourmet flavors are well within reach for the home cook. So, next time you're looking for an impressive yet approachable beef dish, turn to the humble tri-tip and discover the magic of oven roasting. Your taste buds (and your dinner guests) will thank you!