The tri-tip roast, a triangular cut of beef from the bottom sirloin, has long been a secret weapon for grill masters, particularly in its native California. Celebrated for its rich beefy flavor, tender texture, and ideal size for family meals, it’s a versatile cut that delivers gourmet results without breaking the bank. While grilling is a classic approach, mastering how to cook tri tip in the oven opens up a world of culinary possibilities, making this delightful roast accessible all year round, regardless of the weather. Forget battling the elements on a chilly evening; with this ultimate guide, you'll transform a simple tri-tip into a succulent, medium-rare masterpiece right in your kitchen.
Cooking tri tip in the oven, especially with a crucial initial sear, is not just a convenient alternative; it's a technique that guarantees tenderness and a beautiful crust. This method is incredibly forgiving, relatively quick, and produces a finished product worthy of both a casual weeknight dinner and a festive holiday table. The best part? Leftovers are phenomenal, perfect for gourmet sandwiches the next day. If you're looking for an equally excellent guide, explore our article on How to Cook Tri-Tip in the Oven for Tender, Juicy Results.
What Makes Tri-Tip So Special?
Often referred to as Santa Maria steak, California cut, or even triangle roast, the tri-tip’s rising popularity isn't just a regional fad. Its unique qualities make it a standout choice for home cooks:
- Flavorful: It boasts a robust, beefy taste, more pronounced than some leaner cuts, yet not as overwhelming as a chuck roast.
- Tender: When cooked correctly, especially to a medium-rare doneness, the tri-tip is exceptionally tender and juicy. The key is in proper preparation and slicing.
- Versatile: It can be prepared as a whole roast or sliced into individual steaks, adapting to various cooking methods and preferences.
- Affordable: Compared to prime rib or tenderloin, tri-tip offers fantastic value, allowing you to enjoy a high-quality roast without the hefty price tag.
- Family-Friendly Size: Typically weighing 1.5 to 3 pounds, it’s perfectly sized to feed a family of 4-6, with potential for delicious leftovers.
Many home chefs are discovering the joys of this cut, realizing it's a perfect alternative for when the grill isn't an option. Our guide for Quick & Easy Oven Tri-Tip: Perfect Any Time of Year provides more insights into its year-round appeal.
The Art of the Sear: Building a Flavorful Foundation
The journey to the ultimate tri tip in the oven begins with a powerful sear. This isn't just about browning; it's about activating the Maillard reaction – a complex chemical process that creates hundreds of new flavor compounds and an irresistible crust on the meat's surface. Without this crucial step, your roast risks tasting less dynamic and missing that signature depth.
Choosing Your Pan & Preparing the Roast
For searing, a heavy-bottomed, oven-safe skillet is non-negotiable. A cast iron pan is the gold standard here, known for its superior heat retention and even distribution. Before you even think about heat, remove your tri-tip from its packaging and pat it thoroughly dry with paper towels. Excess moisture is the enemy of a good sear, as it will steam the meat rather than brown it.
Seasoning for Success
Once dry, liberally season both sides of the tri-tip. While a simple blend of coarse kosher salt and freshly cracked black pepper is often all you need to highlight the beef’s natural flavor, feel free to experiment with your favorite steak rubs. Don’t be shy with the seasoning; a generous coating helps form that beautiful crust. Use clean hands to pat the seasoning firmly onto all surfaces of the roast, ensuring it adheres well.
The Searing Process
Heat your heavy skillet over medium-high to high heat on the stovetop until it's smoking slightly. Add a tablespoon or two of a high smoke-point oil, like olive oil or grapeseed oil, and swirl to coat the bottom of the pan. Carefully place the seasoned tri-tip into the hot pan. Sear for 3-4 minutes per side, turning only once. You're looking for a deep, rich brown crust. Resist the urge to move the meat around; let it develop that gorgeous color undisturbed.
Oven Roasting: Achieving Perfect Medium-Rare
Once both sides are beautifully seared, the skillet, with the tri-tip still inside, goes straight into a preheated oven. This seamless transition is why using an oven-safe pan is so vital. The oven provides a gentler, more even heat, allowing the interior of the roast to cook to perfection without over-browning the exterior.
Temperature and Timing
Roast your tri-tip in a 400°F (200°C) oven. A general guideline is about 10 minutes per pound, but this is merely a starting point. The true secret to perfectly cooked tri tip in the oven lies in using a reliable meat thermometer. Tri-tip is at its most tender and flavorful when cooked to medium-rare or rare. Target temperatures for doneness are:
- Rare: 125-130°F (52-54°C)
- Medium-Rare: 130-135°F (54-57°C)
- Medium: 135-140°F (57-60°C)
For the juiciest results, we recommend removing the tri-tip from the oven when it reaches an internal temperature of about 130-135°F for medium-rare. Remember, the meat will continue to cook a few degrees as it rests (carryover cooking), so pulling it out slightly before your desired final temperature is crucial. Insert your thermometer into the thickest part of the roast, avoiding bone or large pockets of fat.
The Finishing Flourish & Essential Resting Period
Once your tri-tip reaches its target temperature, carefully remove the searing hot pan from the oven. This is where you can infuse even more flavor and create a luxurious sauce.
Butter, Garlic, and Herbs
While the pan is still sizzling hot, immediately drop several pats of unsalted butter into it. Add a few smashed cloves of garlic and, if desired, a sprig or two of fresh herbs like rosemary or thyme. The residual heat from the pan will melt the butter, gently cook the garlic, and release the aromatic oils from the herbs, creating a fragrant, rich pan sauce. Use a pot holder to carefully tilt the pan and spoon these buttery juices over your roast. This basting not only adds incredible flavor but also helps to keep the exterior moist.
The Crucial Rest
After basting, tent the tri-tip loosely with aluminum foil and let it rest undisturbed for at least 10-15 minutes. This resting period is non-negotiable for tender, juicy results. During cooking, the muscle fibers contract, pushing the juices towards the center. Resting allows these fibers to relax and the juices to redistribute evenly throughout the roast. Skipping this step means all those precious juices will spill out onto your cutting board, leaving you with a dry, less flavorful roast. The carryover cooking during this time will also bring your tri-tip to its final perfect doneness.
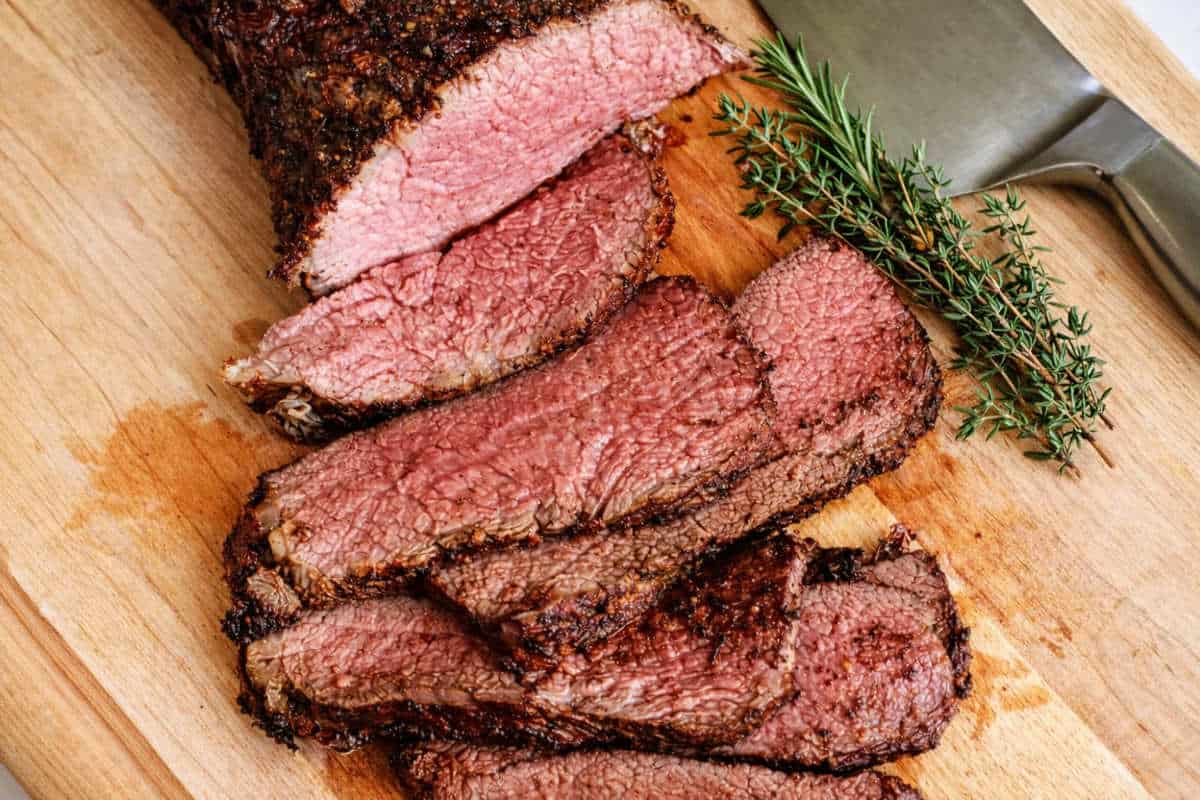
Slicing Against the Grain: The Final Step to Tenderness
After resting, transfer the tri-tip to a clean cutting board. This final step is just as important as the cooking itself. Tri-tip has a unique grain pattern that changes direction, often making it challenging for beginners. Slicing against the grain is vital for tenderness, as it shortens the muscle fibers, making each bite easier to chew.
Take a moment to observe your roast. You'll typically find two distinct grain patterns. Identify where the grain changes direction (usually somewhere in the middle of the triangular cut). Slice the tri-tip into two or three sections along this natural divide, then slice each section against its respective grain. Cut the slices thinly, about ¼ to ½ inch thick. Once sliced, you can return the meat to the pan, spooning the luscious butter and garlic pan juices over the slices for an extra burst of flavor before serving.
Conclusion
Mastering tri tip in the oven transforms an already excellent cut of beef into an accessible, show-stopping meal you can enjoy any time of the year. From the initial flavor-building sear to the precise oven roast and the critical resting and slicing techniques, each step plays a vital role in achieving that perfect medium-rare, juicy, and tender result. With this guide, you’re not just cooking a piece of meat; you’re crafting a culinary experience that’s sure to impress. So go ahead, grab a tri-tip, fire up your oven, and prepare to delight your taste buds!
